
[Solved]Write Code Using Visual Studio Net Programing Language Q37092732
you can write this code using visual studio .netprograming language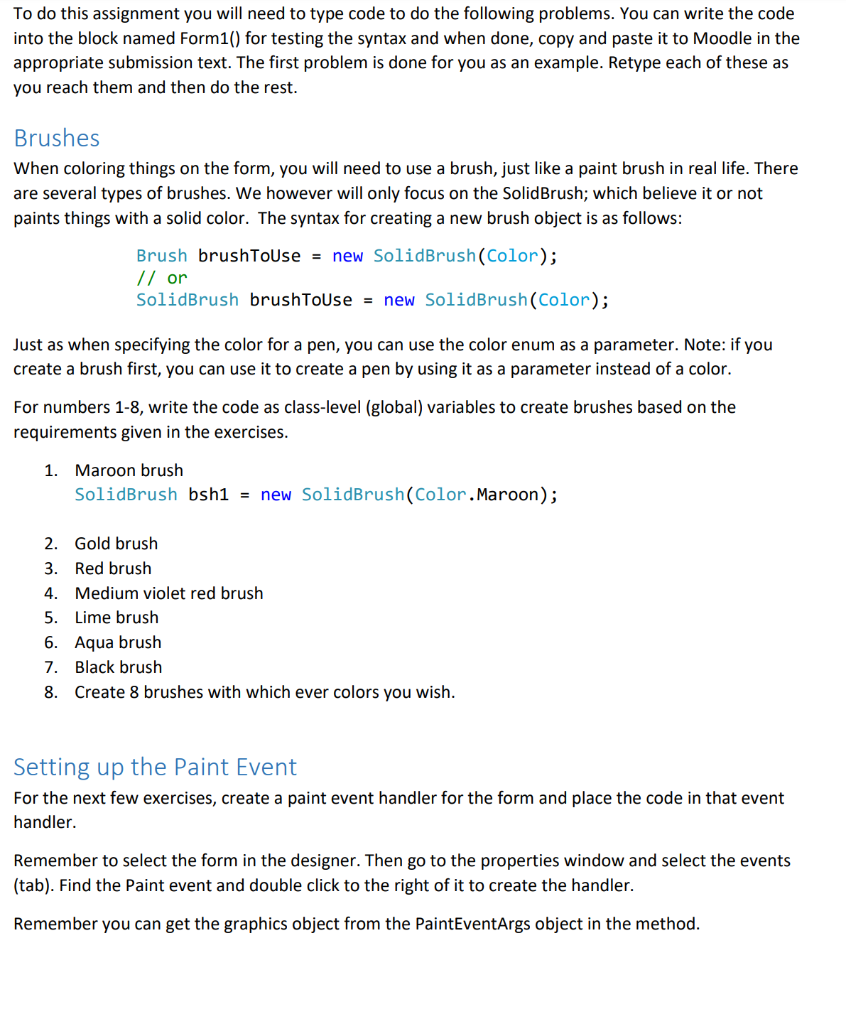
To do this assignment you will need to type code to do the following problems. You can write the code into the block named Form1() for testing the syntax and when done, copy and paste it to Moodle in the appropriate submission text. The first problem is done for you as an example. Retype each of these as you reach them and then do the rest Brushes When coloring things on the form, you will need to use a brush, just like a paint brush in real life. There are several types of brushes. We however will only focus on the SolidBrush; which believe it or not paints things with a solid color. The syntax for creating a new brush object is as follows Brush brushToUsenew SolidBrush (Color); or SolidBrush brushToUsenew SolidBrush (Color) Just as when specifying the color for a pen, you can use the color enum as a parameter. Note: if you create a brush first, you can use it to create a pen by using it as a parameter instead of a color For numbers 1-8, write the code as class-level (global) variables to create brushes based on the requirements given in the exercises 1. Maroon brush SolidBrush bsh1- new SolidBrush (Color.Maroon); 2. Gold brush 3. Red brush 4. Medium violet red brush Lime brush 6. Aqua brush 7. Black brush 8. Create 8 brushes with which ever colors you wish Setting up the Paint Event For the next few exercises, create a paint event handler for the form and place the code in that event handler Remember to select the form in the designer. Then go to the properties window and select the events (tab). Find the Paint event and double click to the right of it to create the handler. Remember you can get the graphics object from the PaintEventArgs object in the method Filled Rectangles Filled rectangles are just rectangles that are filled with a brush instead of drawn with a pen. Filled rectangles do not have a border. You draw a rectangle on top of them to create that effect. The syntax for drawing a filled rectangle is as follows graphicsObject.FillRectangle (brushToFill, startingX, startingY, widthOfRectangle); Rectangle boundRect -new Rectangle(startingX, startingY, graphicsobject.FillRectangle(brushToFill, boundRect); heightOfRectangle, or heightOfRectangle, widthOfRectangle); For numbers 9-18, draw a filled rectangle to the specifications in the exercise. Write the code in the Form’s paint method as you did in the lines section 9. Green rectangle; (sx:10, sy:10) -> (h:50, w:75) Brush thisBrushnew SolidBrush (Color.Green) grphcs.FillRectangle(thisBrush, 10, 10, 50, 75); / or Rectangle boundRect -new Rectangle(10, 10, 50, 75); grphcs.FillRectangle(thisBrush, boundRect); 10. Using the Brush from Exercise 1; (sx:100, sy:0)->(h:20, w:10) 11. Using the Brush from Exercise 2; (sx:0, sy:20) -> (h:23, w:6) 12. Using the Brush from Exercise 3; (sx:100, sy:0)->(40,20) 13. Using the Brush from Exercise 4; (sx:100, sy:0)-> (h:24, w:39) 14. Using the Brush from Exercise 5; (sx:25, sy:25)-> (h:50, w:100) 15. Using the Brush from Exercise 6; (sx:90, sy:90)(ex:130, ey:130) (this is the ending location) 16. Using the Brush from Exercise 7; (sx:25, sy:25) -> (ex:50, ey:100) (this is the ending location) 17. Create a filled rectangle anywhere on the form you wish 18. Create another filled rectangle inside of the rectangle from exercise 17. Filled Ellipses Ellipses are basically as if your computer were to draw an ellipse perfectly inside a bounding rectangle where the edges of the ellipse perfectly touch the center of each side of the rectangle. To draw an ellipse, you will first need the graphics object as with lines and rectangles. Then you will need to specify the starting x and y coordinate and the height and width of the bounding rectangle. The computer will then draw the ellipse inside the rectangle that you specified. The syntax for drawing ellipses is as follows graphics0bject.FillEllipse(penToDrawwith, startingX, startingY, heightOfRectangle, widthOfRectangle); Rectangle boundRectnew Rectangle (startingX, startingY, heightOfRectangle, widthOfRectangle); graphics0bject.FillEllipse (penToDrawwith, boundRect); paint method as you did in the lines and rectangle sections. You may find it useful to comment out the lines code from the rectangle section or call the graphicsObject.Clear() method to keep the form cleaner in appearance. Remember that Clear uses the color specified to wipe clean the form 19. Fuchsia ellipse; 10 pixel; (sx:10, sy:10)-> (h:50, w:75) Brush elBrush new SolidBrush(Color.Fuchsia); grphcs.FillEllipse (elBrush, 0, 0, 50, 75); Rectangle boundRect-new Rectangle(0, 0, 50, 75); grphcs.FillEllipse(elBrush, boundRect); 20. Using the Brush from Exercise 1; (sx:100, sy:0)->(h:20, w:10) 21. Using the Brush from Exercise 2; (sx:0, sy:20) ->(h:23, w:6) 22. Using the Brush from Exercise 3; (sx:100, sy:0) -> (40,20) 23. Using the Brush from Exercise 4; (sx:100, sy:0)h:24, w:39) 24. Using the Brush from Exercise 5; (sx:25, sy:25)->(h:50, w:100) 25. Using the Brush from Exercise 6; (sx:90, sy:90)->(ex:130, ey: 130) (this is the ending location) 26. Using the Brush from Exercise 7; (sx:25, sy:25) -> (ex:50, ey:100) (this is the ending location) 27. Create a filled ellipse anywhere on the form you wish 28. Create another filled ellipse inside of the ellipse from exercise 27 Creating Fonts To be able to write text to the form you will need to have fonts to do so. Fonts are just a set of defined character representations that the computer will use when displaying the text. You are probably familiar with the fonts Arial and Times New Roman. The format for creating a font is as follows Font f1 -new Font(FontFamily, emSize); Font f2-new Font (FontFamily, emSize, FontStyle); Font f3 = new Font (FontName, emSize); Font f4-new Font (FontName, emSize, FontStyle); FontFamily – These are basic groupings of fonts. Although there are several, we will just focus two, Serif and SansSerif. To pick from these I have included what to type below in each description Serif – meaning that it has lines and tails on the letters – FontFamily.GenericSerif Times New Roman is a serif font SansSerif – which means “without” serifs – FontFamily.GenericSansSerif Arial is a SansSerif Font FontName – This is the name of a font that is installed on the computer that will be running the application. This passed in as a string and should match the name of the font such as “Arial” or “Times New Roman” Type: FontStyle. (the font style you want from the list above) For exercises 29-36, create fonts based on the specifications in each exercise 29. SansSerif, 10, Bold Font f29new Font(FontFamily.GenericSansSerif, 10, FontStyle.Bold); 30. SansSerif, 10 (assume regular if a style is not specified) 31. Serif, 15, Italics 32. Times New Roman, 23 33. Arial, 15, Underlined 34. Courier New, 12 35. Mistral, 20 36. Wingdings, 14 Drawing Strings Drawing strings is like drawing filled shapes in that it uses a brush, not use a pen. You must also specify the font and top left position of where to start drawing the string. The format for drawing a string is graphicsObject.DrawString(textToDraw, fontToUse, brushToUse, topLeftXPosition, topLeftYPosition); For numbers 37-48, draw text to the form based on the specifications in each exercise. You may find it useful to comment out the lines code from the rectangle and ellipse sections or call the graphicsObject.Clear() method to keep the form cleaner in appearance 37. Hello World!; font from exercise 29; brush from exercise 1; at 0,0 grphcs.DrawString(“Hello World!”, f29, bsh1, 0, 0); 38. Class is Awesome; font from exercise 30; brush from exercise 2; at 0,20 39. I can write stuff in red.; font from exercise 31; brush from exercise 3; at 0,40 40. A bunch of text; font from exercise 32; brush from exercise 4; at 0,70 41. Some SansSerif Text; font from exercise 33; brush from exercise 5; at 40,130 42. int a 40;; font from exercise 34; brush from exercise 6; at 40,160 43. ABCDEF; font from exercise 35; brush from exercise 7; at 60,180 44. ABCDEF; font from exercise 36; brush from exercise 8; at 60,240 Drawing Lines To draw a bunch of lines in sequence is like a game of connect the dots. You will first need to definea bunch of points in a point array and then pass them to the DrawLines method on the graphicsObject The format is as follows Point[] ptArray- new Point(0, 0), new Point (10, 10), new Point (0, 10), J; grphcs.DrawLines (penToUse, ptArray); DrawLines might draw something like this example if given just three points. I have marked the poin just to make it easier to see what might be going on For exercises 45-50, create point arrays for the points specified. You will uses these arrays in the nex two sections (ex: 1234-3452). You may find it useful to comment out the lines code from the rectan ellipse, and text sections or call the graphicsObject.Clear() method to keep the form cleaner in appearance 45. (10,10); (50,10); (50,50); (10,50) Point[] pt45Arrnew Point (10, 10), new Point(50, 10), new Point(50, 50) J; Point[] pt45Arrnew Point[3]; pt45Arr[]new Point(10, 10); pt45Arr[1]new Point(50, 10); pt45Arr[2]new Point(50, 50); 46. (60,30); (80,50); (100,30); (80,10) 47. (20,60); (5,70); (20,80); (40,80); (40,60) 48. (50,60); (70,80); (35,70); (70,60); (50,80) 49. (10,90); (5,95); (10,100); (90,100); (95,95); (90,90) 50. (10,105); (5,115); (10,125); (90,105); (95,115); (90,125) For exercises 51-56, use the DrawLines method on the graphicsObject to draw the array specified in each of the exercises. You will need to create a pen to use to draw each of these 51. Draw the lines for the array in exercise 45 Pen pen51-new Pen (Color.DarkBlue, 6); grphcs.DrawLines (pen51, pt45Arr); 52. Draw the lines for the array in exercise 46 53. Draw the lines for the array in exercise 47 54. Draw the lines for the array in exercise 48 55. Draw the lines for the array in exercise 49 56. Draw the lines for the array in exercise 50 The only difference between DrawPolygon and the DrawLines is that the first and last points are also connected with a final line. The format is as follows: Point[] ptArray new Point (0, e), new Point (10, 10), new Point(0, 10), J; grphcs.DrawPolygon (penToUse, ptArray); DrawPolygon might draw something like this example if given the same points in the DrawLines example I provided above. I have marked the points just to make it easier to see what might be going on. 3 For exercises 57-56, use the DrawPolygon method on the graphicsObject to draw the array specified in each of the exercises. You will need to create a pen to use to draw each of these. It might be wise to either make the pen smaller than the pen used in the draw lines methods or comment out the code for exercises 51-56 or use the graphicsObject.Clear method to remove the previous lines that were drawn in the previous section. 57. Draw the polygon for the array in exercise 45 Pen pen57 = new Pen(Color . Yellow, 3); grphcs.DrawPolygon (pen57, pt45Arr); 58. Draw the polygon for the array in exercise 46. 59. Draw the polygon for the array in exercise 47. 60. Draw the polygon for the array in exercise 48. 61. Draw the polygon for the array in exercise 49 62. Draw the polygon for the array in exercise 50. Show transcribed image text To do this assignment you will need to type code to do the following problems. You can write the code into the block named Form1() for testing the syntax and when done, copy and paste it to Moodle in the appropriate submission text. The first problem is done for you as an example. Retype each of these as you reach them and then do the rest Brushes When coloring things on the form, you will need to use a brush, just like a paint brush in real life. There are several types of brushes. We however will only focus on the SolidBrush; which believe it or not paints things with a solid color. The syntax for creating a new brush object is as follows Brush brushToUsenew SolidBrush (Color); or SolidBrush brushToUsenew SolidBrush (Color) Just as when specifying the color for a pen, you can use the color enum as a parameter. Note: if you create a brush first, you can use it to create a pen by using it as a parameter instead of a color For numbers 1-8, write the code as class-level (global) variables to create brushes based on the requirements given in the exercises 1. Maroon brush SolidBrush bsh1- new SolidBrush (Color.Maroon); 2. Gold brush 3. Red brush 4. Medium violet red brush Lime brush 6. Aqua brush 7. Black brush 8. Create 8 brushes with which ever colors you wish Setting up the Paint Event For the next few exercises, create a paint event handler for the form and place the code in that event handler Remember to select the form in the designer. Then go to the properties window and select the events (tab). Find the Paint event and double click to the right of it to create the handler. Remember you can get the graphics object from the PaintEventArgs object in the method
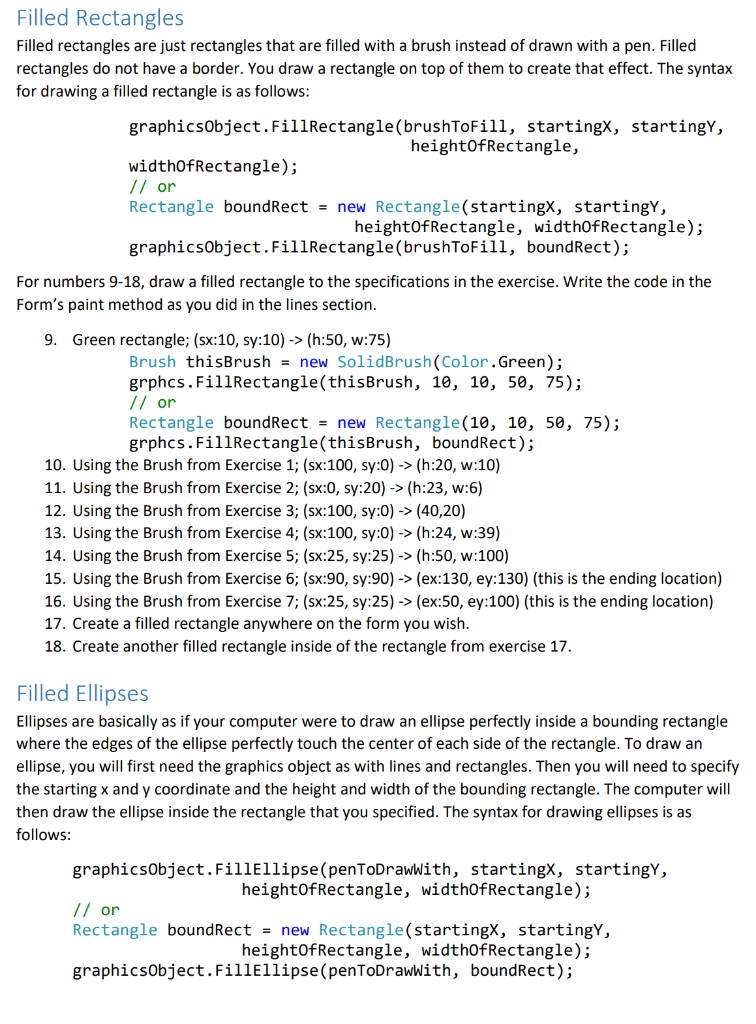
Filled Rectangles Filled rectangles are just rectangles that are filled with a brush instead of drawn with a pen. Filled rectangles do not have a border. You draw a rectangle on top of them to create that effect. The syntax for drawing a filled rectangle is as follows graphicsObject.FillRectangle (brushToFill, startingX, startingY, widthOfRectangle); Rectangle boundRect -new Rectangle(startingX, startingY, graphicsobject.FillRectangle(brushToFill, boundRect); heightOfRectangle, or heightOfRectangle, widthOfRectangle); For numbers 9-18, draw a filled rectangle to the specifications in the exercise. Write the code in the Form’s paint method as you did in the lines section 9. Green rectangle; (sx:10, sy:10) -> (h:50, w:75) Brush thisBrushnew SolidBrush (Color.Green) grphcs.FillRectangle(thisBrush, 10, 10, 50, 75); / or Rectangle boundRect -new Rectangle(10, 10, 50, 75); grphcs.FillRectangle(thisBrush, boundRect); 10. Using the Brush from Exercise 1; (sx:100, sy:0)->(h:20, w:10) 11. Using the Brush from Exercise 2; (sx:0, sy:20) -> (h:23, w:6) 12. Using the Brush from Exercise 3; (sx:100, sy:0)->(40,20) 13. Using the Brush from Exercise 4; (sx:100, sy:0)-> (h:24, w:39) 14. Using the Brush from Exercise 5; (sx:25, sy:25)-> (h:50, w:100) 15. Using the Brush from Exercise 6; (sx:90, sy:90)(ex:130, ey:130) (this is the ending location) 16. Using the Brush from Exercise 7; (sx:25, sy:25) -> (ex:50, ey:100) (this is the ending location) 17. Create a filled rectangle anywhere on the form you wish 18. Create another filled rectangle inside of the rectangle from exercise 17. Filled Ellipses Ellipses are basically as if your computer were to draw an ellipse perfectly inside a bounding rectangle where the edges of the ellipse perfectly touch the center of each side of the rectangle. To draw an ellipse, you will first need the graphics object as with lines and rectangles. Then you will need to specify the starting x and y coordinate and the height and width of the bounding rectangle. The computer will then draw the ellipse inside the rectangle that you specified. The syntax for drawing ellipses is as follows graphics0bject.FillEllipse(penToDrawwith, startingX, startingY, heightOfRectangle, widthOfRectangle); Rectangle boundRectnew Rectangle (startingX, startingY, heightOfRectangle, widthOfRectangle); graphics0bject.FillEllipse (penToDrawwith, boundRect);
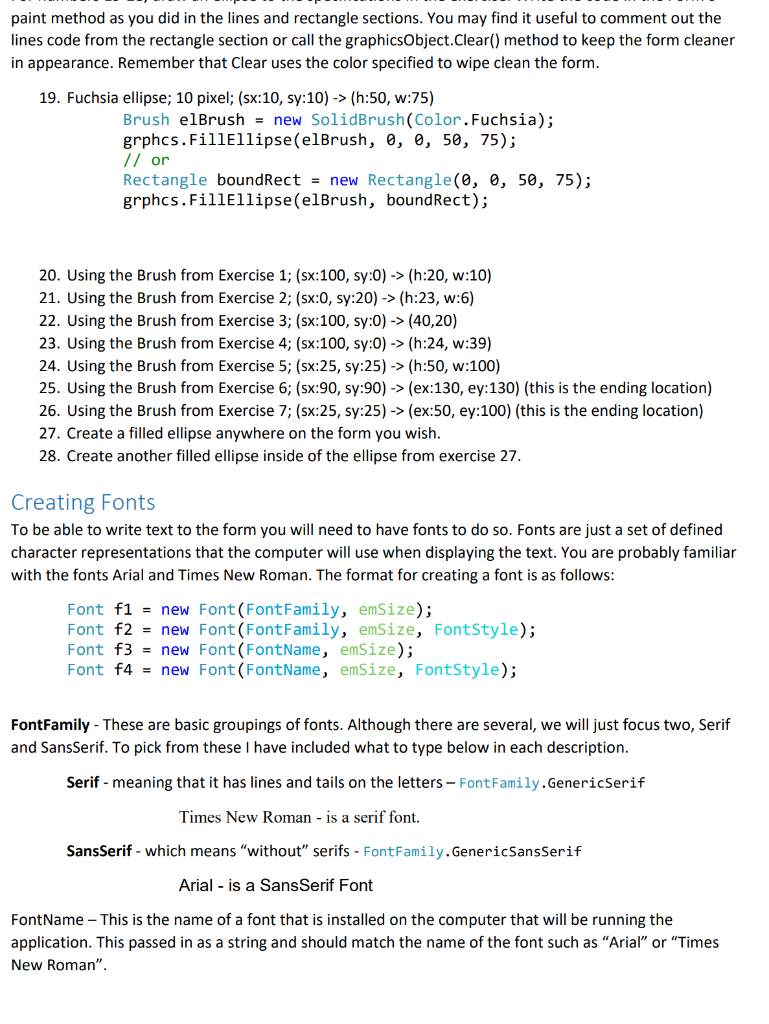
paint method as you did in the lines and rectangle sections. You may find it useful to comment out the lines code from the rectangle section or call the graphicsObject.Clear() method to keep the form cleaner in appearance. Remember that Clear uses the color specified to wipe clean the form 19. Fuchsia ellipse; 10 pixel; (sx:10, sy:10)-> (h:50, w:75) Brush elBrush new SolidBrush(Color.Fuchsia); grphcs.FillEllipse (elBrush, 0, 0, 50, 75); Rectangle boundRect-new Rectangle(0, 0, 50, 75); grphcs.FillEllipse(elBrush, boundRect); 20. Using the Brush from Exercise 1; (sx:100, sy:0)->(h:20, w:10) 21. Using the Brush from Exercise 2; (sx:0, sy:20) ->(h:23, w:6) 22. Using the Brush from Exercise 3; (sx:100, sy:0) -> (40,20) 23. Using the Brush from Exercise 4; (sx:100, sy:0)h:24, w:39) 24. Using the Brush from Exercise 5; (sx:25, sy:25)->(h:50, w:100) 25. Using the Brush from Exercise 6; (sx:90, sy:90)->(ex:130, ey: 130) (this is the ending location) 26. Using the Brush from Exercise 7; (sx:25, sy:25) -> (ex:50, ey:100) (this is the ending location) 27. Create a filled ellipse anywhere on the form you wish 28. Create another filled ellipse inside of the ellipse from exercise 27 Creating Fonts To be able to write text to the form you will need to have fonts to do so. Fonts are just a set of defined character representations that the computer will use when displaying the text. You are probably familiar with the fonts Arial and Times New Roman. The format for creating a font is as follows Font f1 -new Font(FontFamily, emSize); Font f2-new Font (FontFamily, emSize, FontStyle); Font f3 = new Font (FontName, emSize); Font f4-new Font (FontName, emSize, FontStyle); FontFamily – These are basic groupings of fonts. Although there are several, we will just focus two, Serif and SansSerif. To pick from these I have included what to type below in each description Serif – meaning that it has lines and tails on the letters – FontFamily.GenericSerif Times New Roman is a serif font SansSerif – which means “without” serifs – FontFamily.GenericSansSerif Arial is a SansSerif Font FontName – This is the name of a font that is installed on the computer that will be running the application. This passed in as a string and should match the name of the font such as “Arial” or “Times New Roman”
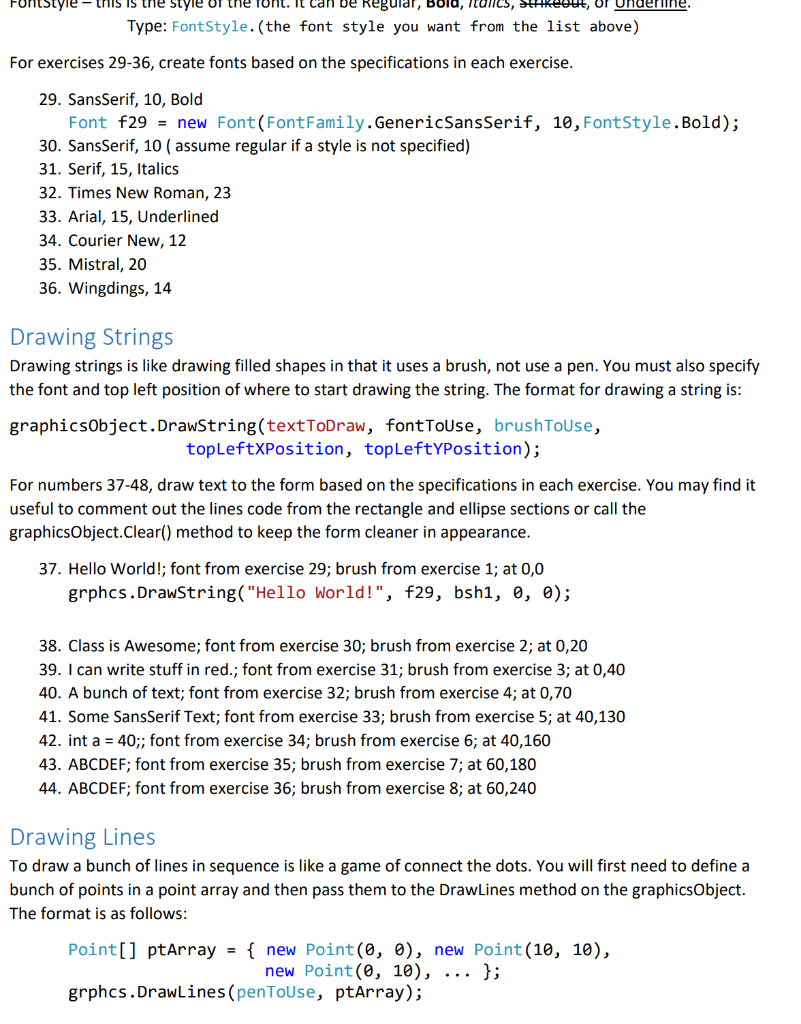
Type: FontStyle. (the font style you want from the list above) For exercises 29-36, create fonts based on the specifications in each exercise 29. SansSerif, 10, Bold Font f29new Font(FontFamily.GenericSansSerif, 10, FontStyle.Bold); 30. SansSerif, 10 (assume regular if a style is not specified) 31. Serif, 15, Italics 32. Times New Roman, 23 33. Arial, 15, Underlined 34. Courier New, 12 35. Mistral, 20 36. Wingdings, 14 Drawing Strings Drawing strings is like drawing filled shapes in that it uses a brush, not use a pen. You must also specify the font and top left position of where to start drawing the string. The format for drawing a string is graphicsObject.DrawString(textToDraw, fontToUse, brushToUse, topLeftXPosition, topLeftYPosition); For numbers 37-48, draw text to the form based on the specifications in each exercise. You may find it useful to comment out the lines code from the rectangle and ellipse sections or call the graphicsObject.Clear() method to keep the form cleaner in appearance 37. Hello World!; font from exercise 29; brush from exercise 1; at 0,0 grphcs.DrawString(“Hello World!”, f29, bsh1, 0, 0); 38. Class is Awesome; font from exercise 30; brush from exercise 2; at 0,20 39. I can write stuff in red.; font from exercise 31; brush from exercise 3; at 0,40 40. A bunch of text; font from exercise 32; brush from exercise 4; at 0,70 41. Some SansSerif Text; font from exercise 33; brush from exercise 5; at 40,130 42. int a 40;; font from exercise 34; brush from exercise 6; at 40,160 43. ABCDEF; font from exercise 35; brush from exercise 7; at 60,180 44. ABCDEF; font from exercise 36; brush from exercise 8; at 60,240 Drawing Lines To draw a bunch of lines in sequence is like a game of connect the dots. You will first need to definea bunch of points in a point array and then pass them to the DrawLines method on the graphicsObject The format is as follows Point[] ptArray- new Point(0, 0), new Point (10, 10), new Point (0, 10), J; grphcs.DrawLines (penToUse, ptArray);
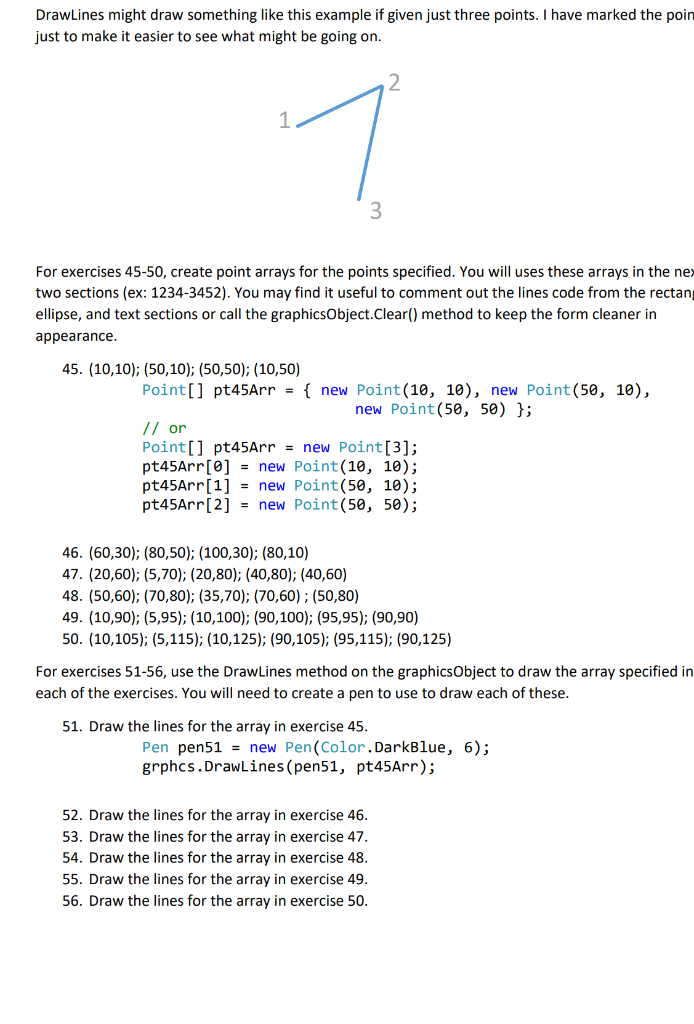
DrawLines might draw something like this example if given just three points. I have marked the poin just to make it easier to see what might be going on For exercises 45-50, create point arrays for the points specified. You will uses these arrays in the nex two sections (ex: 1234-3452). You may find it useful to comment out the lines code from the rectan ellipse, and text sections or call the graphicsObject.Clear() method to keep the form cleaner in appearance 45. (10,10); (50,10); (50,50); (10,50) Point[] pt45Arrnew Point (10, 10), new Point(50, 10), new Point(50, 50) J; Point[] pt45Arrnew Point[3]; pt45Arr[]new Point(10, 10); pt45Arr[1]new Point(50, 10); pt45Arr[2]new Point(50, 50); 46. (60,30); (80,50); (100,30); (80,10) 47. (20,60); (5,70); (20,80); (40,80); (40,60) 48. (50,60); (70,80); (35,70); (70,60); (50,80) 49. (10,90); (5,95); (10,100); (90,100); (95,95); (90,90) 50. (10,105); (5,115); (10,125); (90,105); (95,115); (90,125) For exercises 51-56, use the DrawLines method on the graphicsObject to draw the array specified in each of the exercises. You will need to create a pen to use to draw each of these 51. Draw the lines for the array in exercise 45 Pen pen51-new Pen (Color.DarkBlue, 6); grphcs.DrawLines (pen51, pt45Arr); 52. Draw the lines for the array in exercise 46 53. Draw the lines for the array in exercise 47 54. Draw the lines for the array in exercise 48 55. Draw the lines for the array in exercise 49 56. Draw the lines for the array in exercise 50
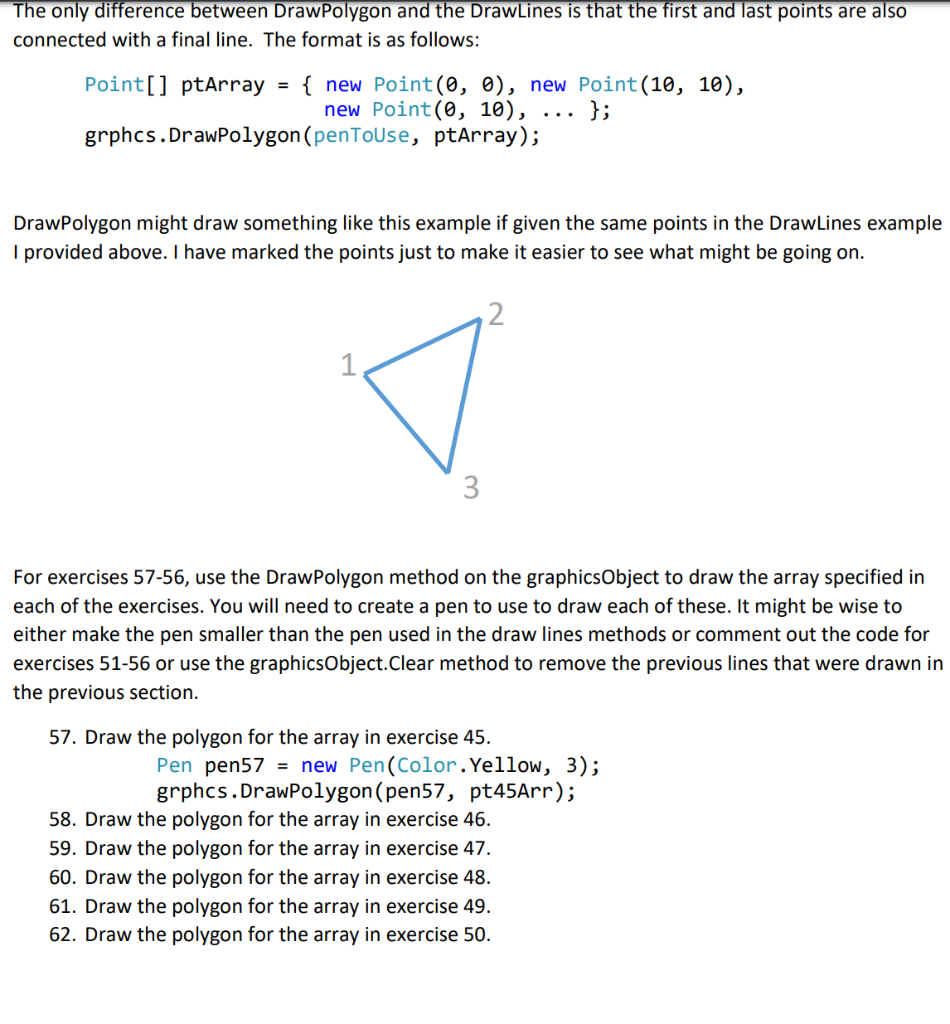
The only difference between DrawPolygon and the DrawLines is that the first and last points are also connected with a final line. The format is as follows: Point[] ptArray new Point (0, e), new Point (10, 10), new Point(0, 10), J; grphcs.DrawPolygon (penToUse, ptArray); DrawPolygon might draw something like this example if given the same points in the DrawLines example I provided above. I have marked the points just to make it easier to see what might be going on. 3 For exercises 57-56, use the DrawPolygon method on the graphicsObject to draw the array specified in each of the exercises. You will need to create a pen to use to draw each of these. It might be wise to either make the pen smaller than the pen used in the draw lines methods or comment out the code for exercises 51-56 or use the graphicsObject.Clear method to remove the previous lines that were drawn in the previous section. 57. Draw the polygon for the array in exercise 45 Pen pen57 = new Pen(Color . Yellow, 3); grphcs.DrawPolygon (pen57, pt45Arr); 58. Draw the polygon for the array in exercise 46. 59. Draw the polygon for the array in exercise 47. 60. Draw the polygon for the array in exercise 48. 61. Draw the polygon for the array in exercise 49 62. Draw the polygon for the array in exercise 50.
Expert Answer
Answer to you can write this code using visual studio .net programing language… . . .
OR